The Science of Winning: Proven Tips to Mentally Prepare for a Track Meet
The spring sun is warm on your back as you plant your feet into the starting blocks. The snug fit of your track spikes keeps you grounded—...
The Shot Put is one of the most technical events in track and field.
To be successful, it takes strength, speed, power, and rhythm. But above all, it takes proper technique.
This guide will cover the key positions and movements that will help you or your athletes go from zero to shot putting in no time.
Our focus will be on the standing throw (aka power position), which is the first critical step in learning how to throw the shot put.
Developing a proper stand throw is the foundation of all shot put technique. It's the starting point for practicing, coaching, and learning the event.
Every successful thrower has developed and continues to refine proper stand throw technique.
It's not essential to master the stand throw before moving on to the half turn, full turn, or glide.
However, an athlete should be reasonably proficient at hitting the correct positions and sequence of movement.
Otherwise, they will just be reinforcing incorrect technique, and progress will become very difficult.
Bad habits can prove very challenging as an athlete progresses in their career.
It’s very difficult to ‘unlearn’ thousands of incorrect reps that become hardwired in the nervous system.
There is nothing a thrower can do in the back of the ring to compensate for poor technique in the front.
If you want to throw the shot put further, you must get your stand throw dialed in.
This is especially important when learning how to throw shot put for beginners.
Getting the technicalities correct might seem like a trivial detail at first.
However, understanding the naming conventions of the shot put gives us important clues about the event's technique and rules.
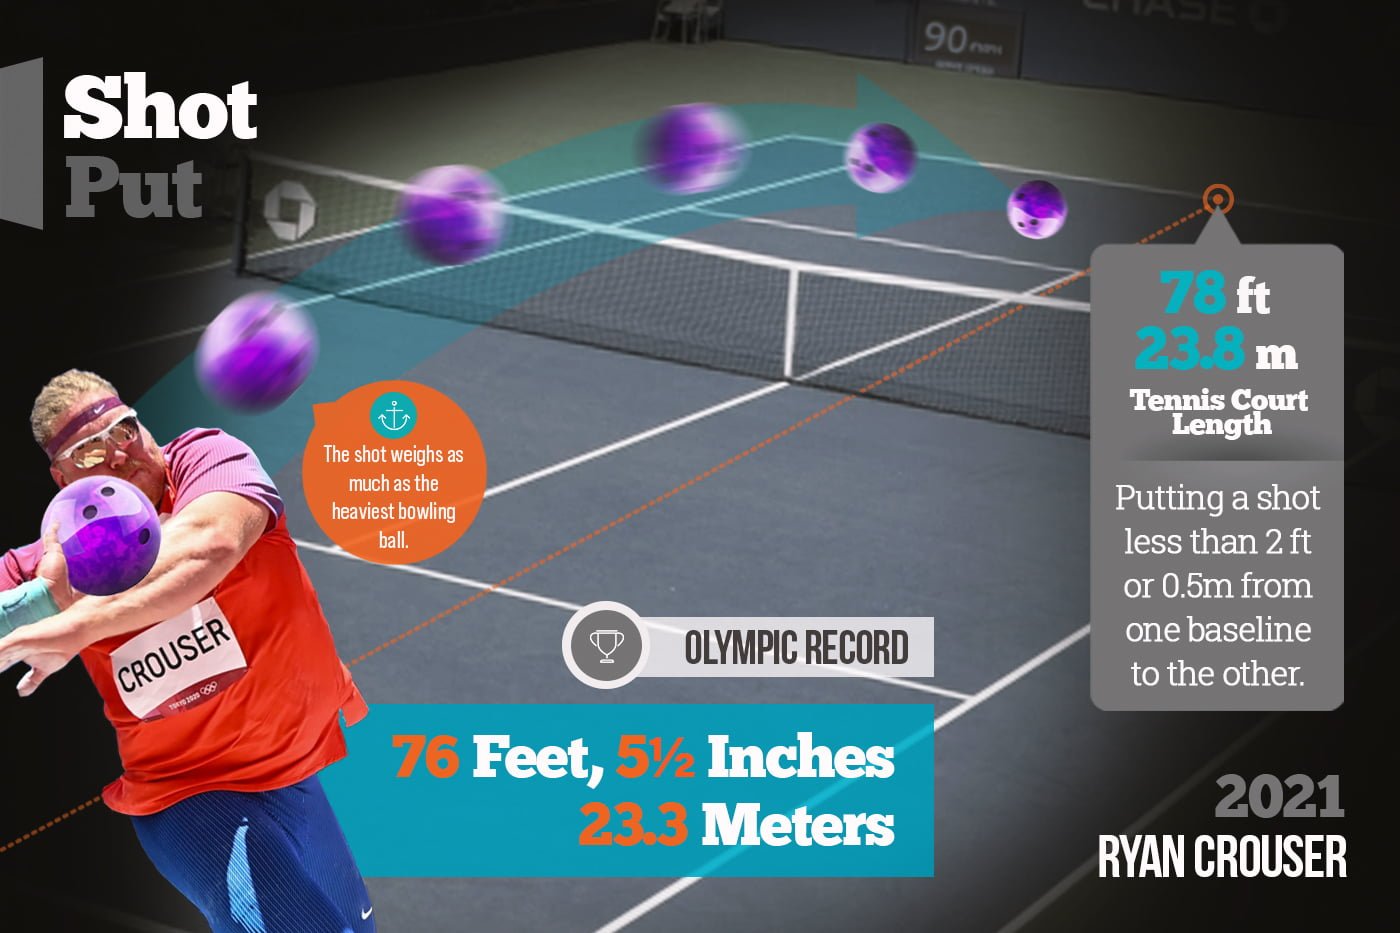
The implement is called a shot (not a shot put). Shot weight plays an outsized role when it comes to technique. This is why you will notice some substantial differences between men and women regarding speed out of the back of the ring, delivery style, etc.
The weight of the shot for high school competitions is 5.4kg/12 lb for men and 4kg/8.8lb for women.
In college and international meets (IAAF, Olympics, etc.), the weight for the men's shot increases to 7.26kg/16lb and stays at 4kg/8.8lb for women.
The shot is 'put' not 'thrown.'
What's the difference?
A throw resembles anything you'd see from a baseball pitcher to a discus thrower.
A put is a pressing movement with basically no shoulder rotation. The implement follows a straight path from the neck through the release.
The distinction between a throw and a put is important for two reasons.
Having said all of that - shot putters are considered throwers (no one wants to self-identify as a 'putter').
And referring to 'throws,' i.e., technical elements during the "throw," doing "6 full throws" etc., is standard terminology.
Referring to a shot as a shot put is so common we even do so a few times in this article.
There are differences between the stand throw for the glide and the spin.
The following instructions provide a general framework for learning how to throw the shot put as a rotational thrower.
However, they can be tailored to the glide.
Some key differences will be in the stance, which should be much wider than shoulder width.
The body angle is more bent over the right leg, and the motion is much more vertical than rotational.
The following positions are for a right-handed thrower. For left-handed throwers, reverse them.
The proper placement of the shot in the hand is at the base of the fingers at the top of the palm, with the thumb supporting the bottom of the shot.

A great way to find this position is for the athlete to raise their arm above their head with the shot in their hand.
Ensure the shot is secure so it won't fall out of the hand and injure the athlete.
This will help the thrower feel the natural balance of the shot in the hand.

The placement of the shot put on the neck is behind the ear and below the jaw.
This position will vary from thrower to thrower and might change as the athlete progresses in their career.
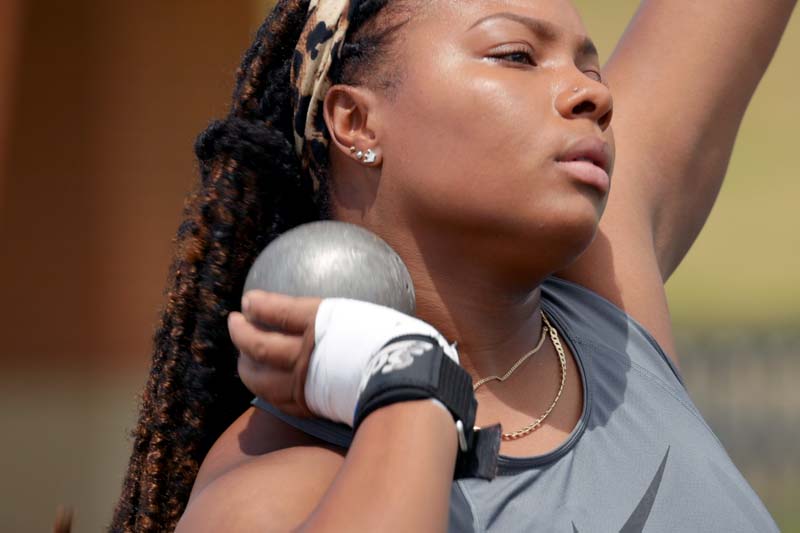
The throwing arm should be about 90° from the torso. The elbow should comfortably bend so the shot is snug against the neck.
The position of the shot in relation to the body before starting the movement should be behind the right heel.
Tip: For beginning throwers learning how to throw the shot put, it's beneficial to get comfortable with these positions without the shot.
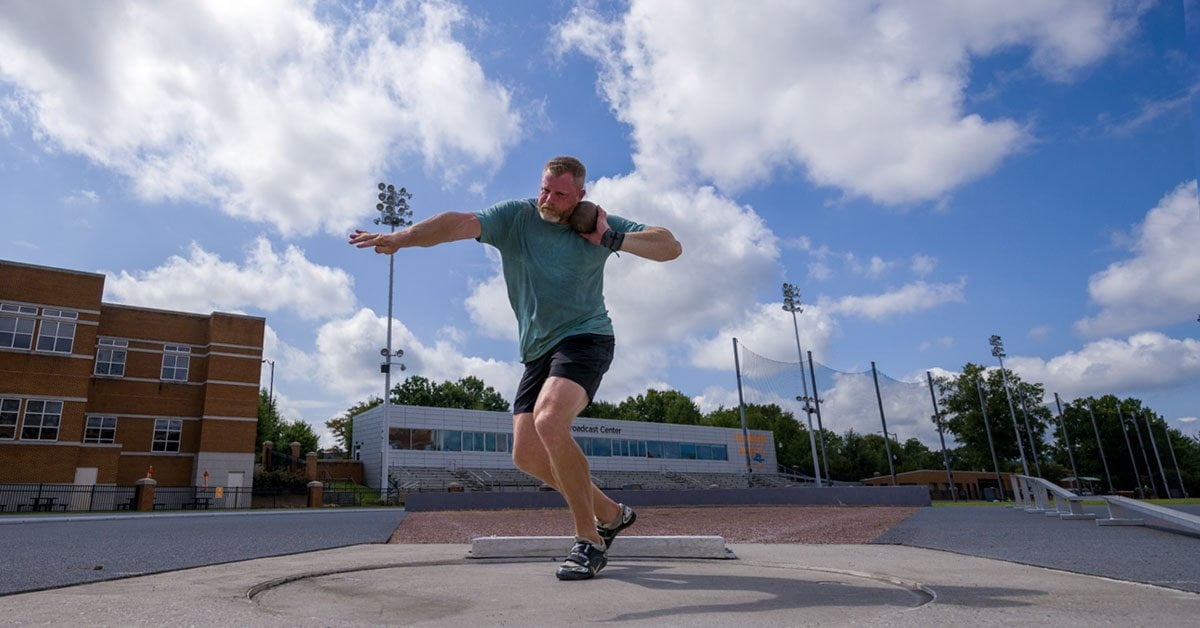
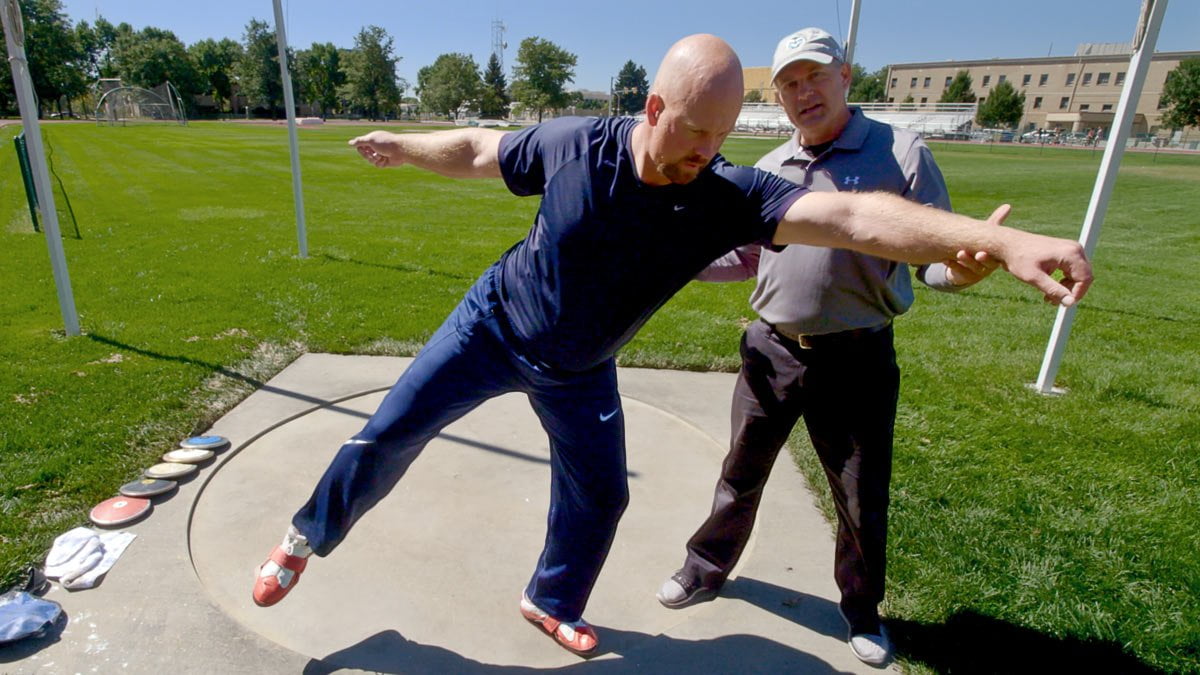
Face the right side of the ring. The feet should be slightly wider than shoulder width.
Start with the left foot by the toeboard and the right foot towards the center of the ring.
There should be a heel-to-toe relationship with the feet, where the right heel should be in a straight line with the left toe.
This stance is very similar to a discus standing throw. The right foot should be pointed at ~10 o'clock (imagine the ring as a clock that you are looking down upon).

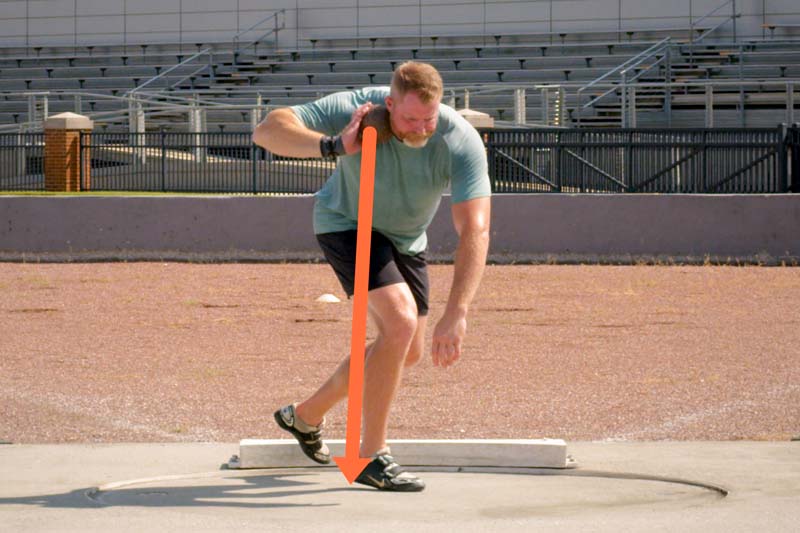
The front leg should be almost (not totally) straight, and the back leg should be bent at a ~50°- 80° angle. Roughly 80% of the athlete's weight should be on that back leg.

The torso should be upright with a straight back facing away from the sector.
There should be a straight line from the athletes head down to the left heel.
The non-throwing arm should be straight and 90° from the torso.
Check out the video below to see a great way for a beginning shot putter to get into the correct positions.
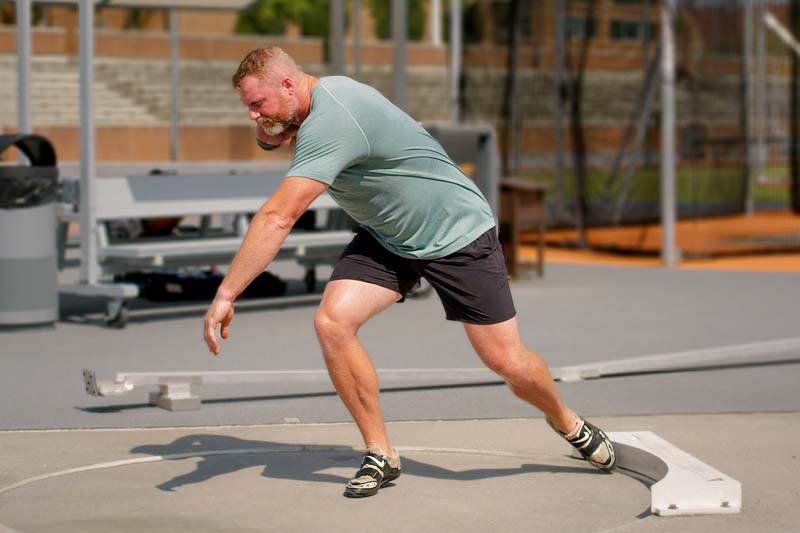
The left arm moves first. It's essential that at this stage, the shot doesn't move at all. It's just an opening movement.
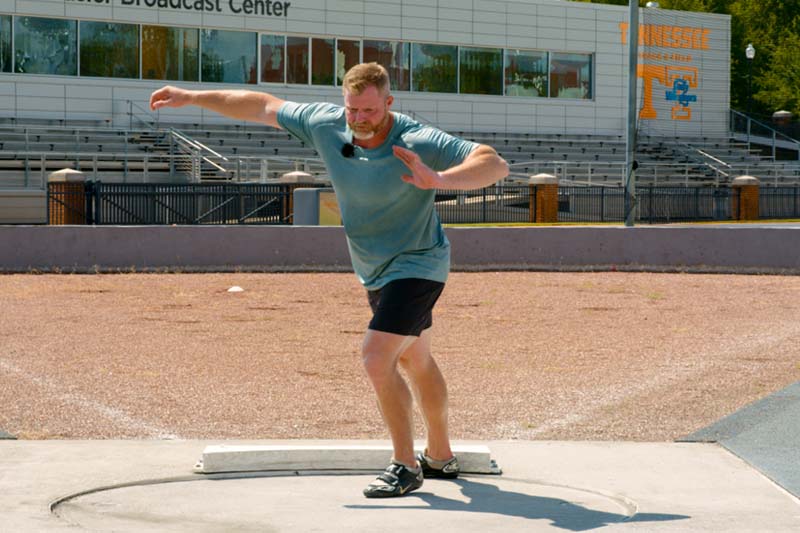
This starts with the right foot turning, followed by the right knee and then the right hip.
The goal is to create tension or stretch between the upper and lower body
The hips rotate towards the sector ahead of the upper body while maintaining a backward lean.
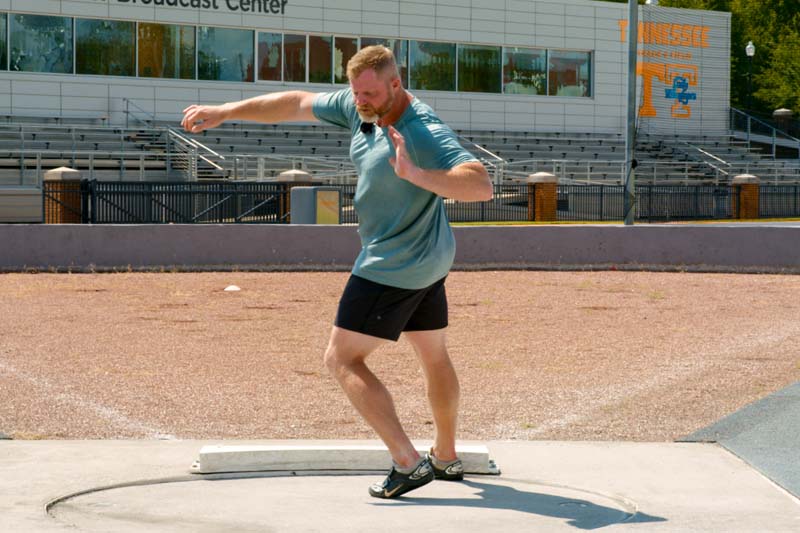
The back leg should remain bent throughout the entire motion.

At this point, the upper body should follow, and the blocking arm should stop.
This action helps transfer the stored energy into the shot.
The head and eyes should remain up, and the shoulders should be level and square to the sector.
The last phase is the putting motion with the right arm. It should drive straight from the torso. The upper body position, not the arm angle, determines the release position.
The majority of power comes from the lower body, not the arm.
Think of it more like a fast whipping action vs. a slow push.
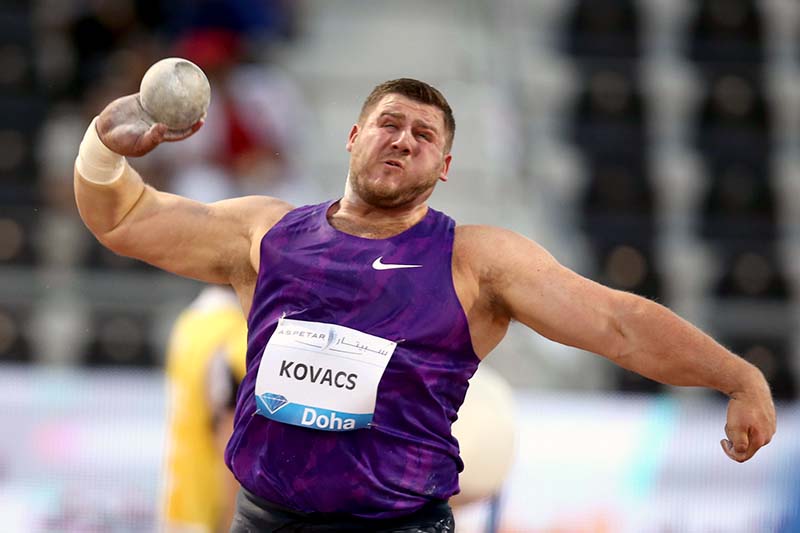
The whip action is something Joe Kovacs frequently talks about.
“At the end of the day, it’s all about whipping the ball. For me, I want to turn my body into the golf club when you see it coming down and the shaft is starting to bend.”
Kovacs goes on to say “If you’re just trying to hit hard, you’re throwing the ball. If you’re putting yourself in the right position, you’re whipping the ball.”
Watch the video below to see sequence of movement in action.
Many articles and coaches say things like "explode off the right" or "push off the right."
While good-intentioned, this is one of the worst coaching cues out there. Why?
Because it saps a considerable amount of power from the throw and leads to all types of incorrect positions.
The right leg should stay grounded throughout the throw and continue to turn.
Staying grounded helps transfer all of the power generated by the lower body to the shot.
If an athlete 'pushes off the right,' they lose that rotation and almost always come off the ground.
Once a thrower leaves the ground, they no longer have anything to push against, which is problematic. Because a sizeable percentage of the force they are applying to the shot is lost as it pushes them back to the ground.
Remember Newton's 3rd law 'for every action; there is an equal and opposite reaction.'

Take away the reverse and cue the athlete to stay grounded. Non-reverse throws encourage good finishing positions and eliminate the tendency to jump during the release.
Another option is to take away the shot entirely and focus on hitting the movement in the ring or with line drills on the track.
Not staying grounded is common issue that can be difficult to fix, even with the above options.
Using mental practice can be a great way to help athletes visualize themselves performing the movement correctly (and this applies to all elements of the throw).
Science has shown that when mental practice is performed properly, it will indeed carry over into the ring.
This is a common error, especially with beginners that are learning how to throw the shot put. If a thrower starts too bent over at the waist, the rest of the movement will be a disaster.
The shot's path will be too low, and the torso position will be incorrect. The legs and hips won't be able to engage and produce force properly.

A method to help develop the correct poster is to take away the shot and start with a stick across the shoulders. A stick will help focus the athlete's attention on what their body is doing and provide an immediate visual cue for coaches.
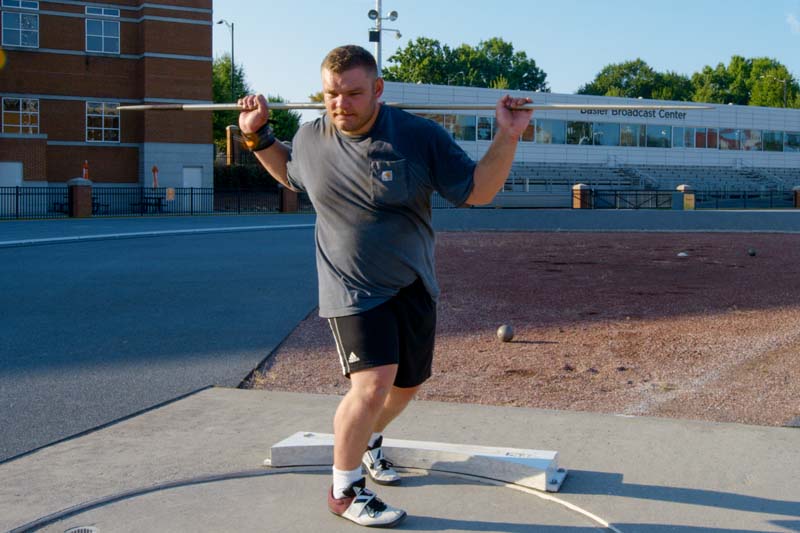
Many beginning throwers want to 'hit it hard,' which typically leads to an overactive upper body and rushed movement.
Leading with the upper body causes all sorts of issues that will compound during the full throw.
Every great thrower, whether they glide or spin, maximizes the power from their lower body. From slower giants like Ryan Crouser to smaller, faster throwers like Joe Kovacs, they all have patient upper bodies.
An over-active upper body is a bad habit that many stronger, more powerful high school throwers can 'get away with.' I've seen many juniors and seniors who can muscle out some decent throws with the 12-pound shot.
However, once they move up to the 16-pounder in college, they pay the price. Four pounds might not seem like a lot, but it makes a huge difference. The 16-pound ball has a way of exposing and magnifying any weaknesses in technique.
A drill for throwers that have this tendency is standing throws with a med ball.
Having both hands on the ball will help the focus shift to the lower body and reinforce the proper sensations and rhythm of the throw.
Non-reverse standing throws while focusing on not throwing the block arm open will also help.
Footwork drills and even static position drills where the athlete can feel the stretch can be very effective as well.
I'd be remiss if I didn't mention how important shoes are. If an athlete is going to throw the shot, getting the proper footwear is not optional. It's mandatory.
Go to any high school track meet, and chances are a quarter to a half or more of the athletes are throwing in running shoes, basketball shoes, wrestling shoes, etc.
It seems like a somewhat unique problem with throwing events. Have you ever seen a serious sprinter compete in basketball shoes?

A proper throwing shoe serves several purposes.
First, they provide the right amount of friction for the rotational movements in the ring. Climbing shoes or wrestling shoes were not designed with this function in mind.
Second, they encourage the natural rotation of the ball of the foot required for throwing with specific support and padding on the sole.
Third, they have a very tight fit that is much different than, say, a running shoe.
There are many good options, and most likely, the decision criteria will come down to the thrower's anatomy, speed preference, and which brand feels best.
The Nike Zoom rotational series are a staple and work exceptionally well for most throwers. They strike a good balance between performance and durability.
Another option is the Saucony Unleash SD. They are fast shoes designed for more advanced throwers. There have been some concerns raised about their durability, but if you've got the need for speed, they should be on your list.
The ASICS Throw Pro is on the opposite end of the spectrum. A slower shoe that is very durable and geared more towards beginner throwers. They can prove challenging in wet conditions, so if you throw a lot in the rain, look to the other options.
As coach John Newell says, 'shot putting is all about persistence.' It takes time and dedication to make progress.
It's also a sport that rewards those who don't cut corners. If you put the work in upfront and develop the proper technique, you will be able to maximize your potential and enjoy this fantastic sport.
If you want to take your shot put technique and drills to the next level check out Smarter Shot Put.

This information has been well received. I will implement it with my throwers during the off season in the summer track season.
Great to hear Nathaniel, let us know how it goes and best of luck this season!
Liked the emphasis on the stance, posture throughout the movement, the stress on step-by-step, but reversal on LEFT AND RIGHT verbage vs visual, could be confusing to a new thrower.
Thanks for the feedback Michael
great piece john, the best intro on the web
Appreciate it Richard!
Good
Good day
I'm a school student doing a project on shot put i'm clueless on the information to put my project into contents.
i will appreciate if you can share a little guide or advise for me to be able to do my research confidently
Thanks & regards
A well earthen. Article and explained clearly all the components of the shot put.
your a god